


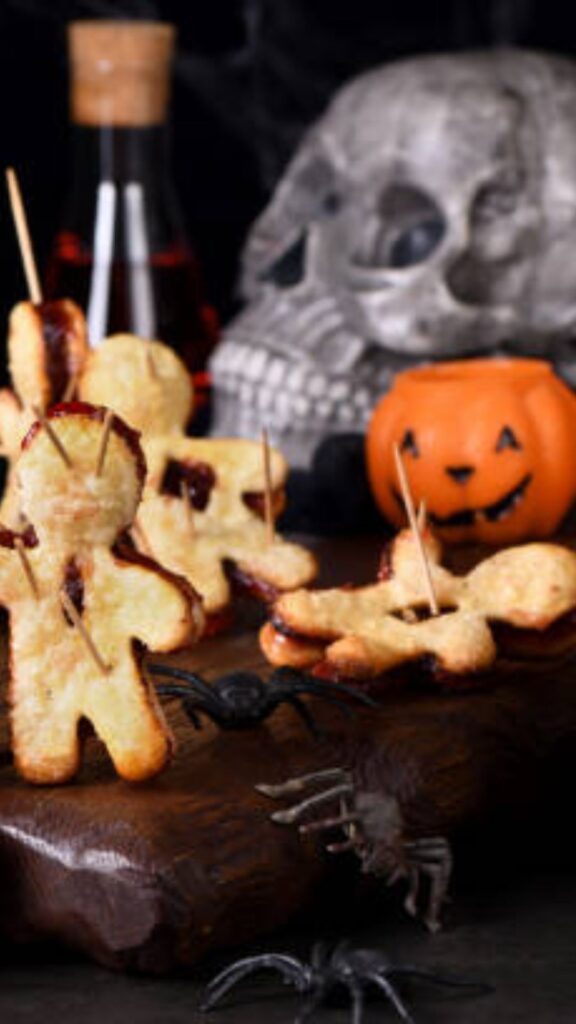
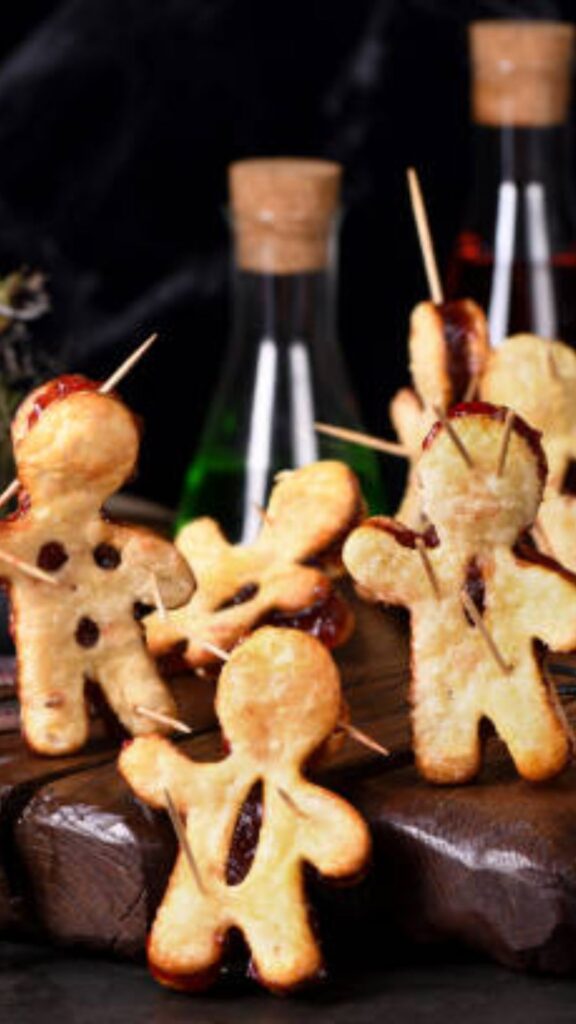
Looking for a spooky-but-simple Halloween party food to wow your guests? These Easy Puff Pastry Voodoo Dolls with honey fake blood are just the ticket! These creepy little pastries look menacingly yummy, but are so easy that even kitchen beginners can whip them up. Imagine flaky golden doll-shaped pastries drizzled with a bright red “blood” of sweet honey – a ghoulish treat that’s sure to give everyone a happy fright.
In fact, Food Network notes that many Halloween recipes “are sure to scare up everyone’s appetite,” yet “none of these recipes are too tricky to make”. That couldn’t be more true of our cute voodoo doll pastries. They’re vegetarian-friendly and nut-free (no peanuts here), making them safe for most dietary needs. With just a few pantry staples and minimal fuss, you’ll be handing out laughs and shrieks instead of tricks!
These Halloween finger foods double as a spooky dessert that your family and friends will rave about. They’re as fun to serve as they are to eat: crunchy puff pastry dolls hiding a playful “blood” surprise. Whether you call them Halloween scary food or a creepy-sweet treat, they’re guaranteed to be a party hit. Get ready to cast a delicious spell in your kitchen!
Why You’ll Love Easy Puff Pastry Voodoo Dolls with Honey Fake Blood Recipe
- Spooky Party Food, Simply Made: These puff pastry voodoo dolls look like something out of a haunted kitchen, yet they’re surprisingly easy to make. Just roll, cut, and bake – no complicated techniques. In fact, one blogger describes a similar recipe as a “fun, easy, yet creepy dessert” perfect for Halloween.
- Perfect Halloween Finger Food: Miniature and handheld, these pastries are ideal finger foods for a Halloween buffet. They’re a novel way to serve a dessert – guests can grab and gobble these dolls up one by one. As Food Network points out, spooky recipes that “scare up everyone’s appetite” are the life of any party.
- Kid (and Grown-Up) Friendly: No scary cooking skills required! The recipe is straightforward and safe for beginners (even young helpers can assist with simple tasks). And because there are no actual body parts involved, just lots of fun pretend play, kids love cracking up over these prankish treats.
- Dietary-Friendly: This recipe is vegetarian and nut-free, so it’s great for parties where guests have allergies or dietary restrictions. (Just double-check your puff pastry ingredients – some brands may contain milk or butter; using dairy-free pastry keeps it vegan, if that’s desired.)
- Impressive Results, Little Effort: These voodoo dolls look like a professional trick, but you don’t have to be a chef to pull them off. With just 3–5 ingredients and easy steps, you’ll produce something that looks highly detailed and festive. Your guests will think you spent all day on them – but you’ll know how fast they came together!
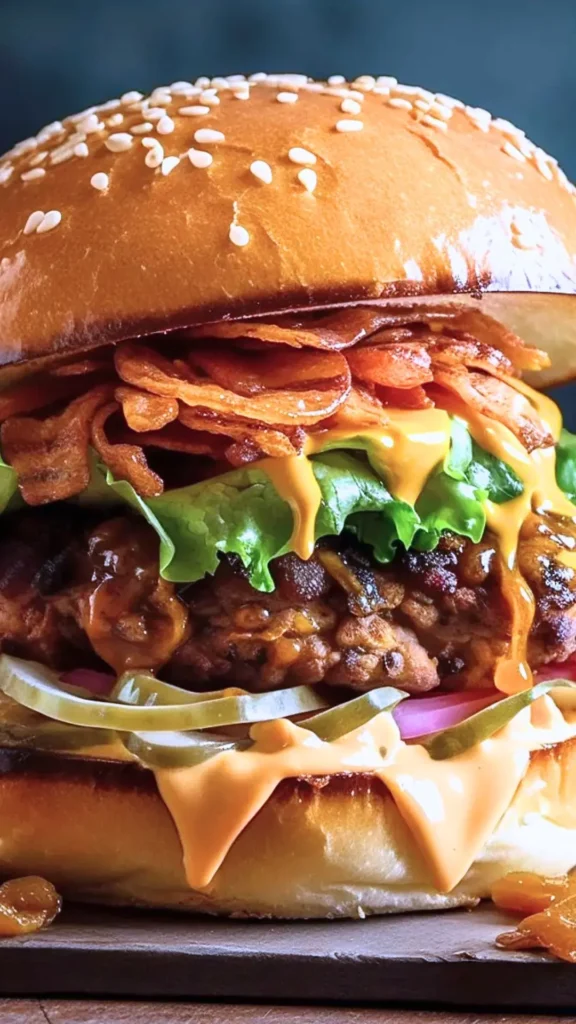
Try Amazing Burger with Melted Cheese Recipe
Ingredients
- Puff Pastry: 2 sheets of store-bought puff pastry (typically in a 17.3oz package; contains 2 sheets). Thaw according to package instructions so it’s soft enough to work with.
- Milk (for wash): 1 tablespoon plant-based milk (almond/soy/oat) or regular milk. This is brushed on top so the pastry bakes to a nice golden brown.
- Honey (Fake Blood): About 3–4 tablespoons honey. This will be tinted red to create the “fake blood” drizzle.
- Red Food Coloring: A few drops of red gel or liquid food coloring to mix into the honey. This gives the honey its blood-red color. (Tip: use gel coloring if you can – it won’t thin out the honey as much.)
- Optional – Cocoa Powder: A pinch of unsweetened cocoa powder (for deepening the color to a dark crimson, if desired).
- Optional – Jam or Jelly: 1–2 tablespoons of raspberry or strawberry jam (to use as a hidden filling, for extra flavor or “gore”). If you like, spread a little jam inside the dolls before sealing them.
- Salt (optional): A tiny pinch of salt can be added to the honey mixture to cut sweetness, if you like.
Pro Tip: We’re using honey instead of corn syrup for the fake blood. Honey naturally makes a thick, sticky blood consistency (Spruce Crafts notes that honey “makes the blood more thick and sticky” in their fake-blood recipe). If you don’t have corn syrup, honey is a perfect (and edible!) substitute for that gooey effect.
Equipment
- Baking Sheet: A rimmed baking tray lined with parchment paper or a silicone baking mat.
- Rolling Pin: To gently roll out the pastry sheets and smooth any seams. (If your pastry is already smooth and flat, you can skip rolling, but lightly pressing out folds helps.)
- Cookie Cutter: A 3–4 inch person-shaped cutter (like a gingerbread man cutter) works perfectly. This is what creates the “doll” shape. If you don’t have one, you can freehand-cut a doll shape with a sharp knife.
- Paring Knife or Small Sharp Knife: To cut eye, mouth and other detail holes into the pastry dolls. A toothpick or straw also works for making small holes (like eyes).
- Pastry Brush: For brushing the tops of the pastry with milk (or egg wash, if you prefer).
- Mixing Bowl & Spoon: A small bowl and spoon (or whisk) to mix the honey blood.
- Cooling Rack: To cool the pastries slightly after baking so they crisp up nicely.
- Spatula: For removing the dolls from the baking sheet.
Servings
Makes: About 6 voodoo dolls (each doll serves one person). You can easily double or triple the recipe for a larger crowd. Each person typically enjoys one doll as a snack or dessert bite.
Preparation Time
- Prep Time: ~15 minutes (plus thawing pastry)
- Cook Time: 15–20 minutes
- Total Time: ~30–35 minutes (hands-on time)
Step-by-Step Instructions For Easy Puff Pastry Voodoo Dolls with Honey Fake Blood
- Thaw & Prep the Pastry: Thaw your puff pastry sheets according to package directions, just until they can be handled. Don’t over-thaw or they’ll be too sticky. Unfold or unroll each sheet on a lightly floured surface. Use a rolling pin to gently smooth out the creases and flatten it to an even thickness. If the dough feels too warm or sticky, pop it in the fridge for a few minutes – cooler pastry is much easier to cut cleanly.
- Cut Out the Dolls: Using your person-shaped cookie cutter, cut as many doll shapes as you can from the pastry (you should get about 6 shapes from 2 sheets). If there’s leftover scraps, you can reroll and cut more shapes or simply discard scraps. Gather two matching shapes for each doll (one will be the front, one the back).
- (Optional) Add a Filling: If you want an extra layer of flavor, spread a thin layer (~½ teaspoon) of raspberry or strawberry jam onto one of the matching dough pieces (leaving a small border so it doesn’t leak). This gives a fruity “gore” center. If you skip the filling, you can still stack them for thickness.
- Assemble & Seal: Place one doll-shaped piece on the prepared baking sheet. If using jam, set it jam-side-up. Lay the second piece of dough on top, aligning it carefully. Press the edges together firmly, pinching or crimping with your fingers (or a fork) all around the doll to seal it like a little pastry pocket. This keeps them together in the oven and creates a layered look. Repeat for all 6 dolls.
- Cut the Face Details: Carefully use a sharp knife, a straw, or a toothpick to cut out simple facial features on each doll. You can make two round eye holes and a jagged mouth to look extra creepy. Don’t cut all the way through – just puncture the top layer so the features appear when baked. These holes and gashes will later fill with the honey “blood.”
- Egg Wash (or Milk Wash): Brush the tops of each assembled doll lightly with milk. This will help them brown up nicely. If you’re not vegan, you can use beaten egg or egg yolk instead for a glossier, deeper color.
- Bake: Slide the baking sheet into the oven (middle rack) and bake at 400°F (200°C) for about 15–20 minutes, or until the voodoo dolls are puffed and golden brown on top. Every oven is different, so start checking around 12 minutes. They should be crisp and swollen. Remove them carefully and transfer the dolls to a cooling rack.
- Prepare the Honey ‘Blood’: While the dolls bake, mix the fake blood. In a small bowl, pour the honey and add a few drops of red food coloring. Stir until the honey turns a deep, blood-red color. (Add a tiny pinch of cocoa powder if you want an extra-dark, more realistic shade.) [Tip: Spruce Crafts suggests using honey over corn syrup, noting that honey makes a “thick, sticky” fake blood. The thickness helps it cling to the pastry.) Adjust the color with more dye until it looks right.
- Drizzle the Fake Blood: Once the voodoo dolls are baked and still warm (but not piping hot), gently spoon or drizzle the red honey all over the pastries. Let it pool around the eye and mouth holes so it looks like blood is oozing out. You can let the honey run down the sides for a gory drip effect. If the honey is too thin to drip nicely, let the dolls cool a minute more so the honey thickens slightly.
- Cool & Serve: Let the dolls sit for a couple of minutes to set. The honey will harden just slightly, creating a shiny blood-like glaze. Transfer them to a serving platter. Your Halloween scary dessert is ready to haunt the table!
Chef’s Tip: Work quickly with the honey. If it cools completely, it can harden. If it’s too warm, it will run off, so aim to drizzle when the dolls have cooled just a bit. Also, keep a rag handy – honey is sticky!
Nutrition Facts (per serving)
- Calories: ~99 kcal
- Total Fat: ~3 g
- Carbohydrates: ~17 g (mostly from the pastry and honey)
- Sugars: ~14 g (from pastry sugar and added honey)
- Protein: ~2 g
Nutrition above is an estimate per voodoo doll (1 serving). Actual values will vary by brands and any fillings you use. Honey and jam will increase the sugar content. For a lower-sugar version, use less honey.
How to Serve
- Serve Warm: These voodoo dolls are best enjoyed warm or at room temperature. When warm, the puff pastry is extra flaky and the honey stays pliable, enhancing the spooky effect.
- Spooky Platter: Present them on a dark or decorative plate (even a platter with fake spiderwebs). The red honey blood looks especially chilling on a black or white plate. You could even garnish the plate with candy eyeballs or licorice “pins” to stick in the dolls for extra gore.
- Finger Food: They’re perfect as finger foods or party snacks – no utensils needed. Place them on your Halloween buffet table alongside other treats like Halloween monster meatballs or witches’ brew punch.
- Dipping Sauce: For a “doppable” twist, set out a small bowl of raspberry sauce or extra red jam nearby. Guests can dip the dolls into the sauce for even more “blood.”
- Dessert Table: These work well as a scary dessert too. Pair them with themed cupcakes or cookies, or serve with a scoop of vanilla ice cream topped with raspberry sauce for a “bloody brain” effect.
Serving Suggestion: These make an excellent finale for a Halloween menu. Try serving them alongside a bloody red fruit punch or apple cider, which complements the honey’s sweetness and keeps the scary theme strong.
Additional Tips
- Chill If Needed: If the puff pastry feels very soft or warm while you’re working, pop it in the freezer for 5–10 minutes. Chilled pastry is much easier to cut and shape.
- Seal Well: Use a fork or pinch firmly to seal the edges of each doll so no filling (or honey) leaks out during baking. If you do add jam inside, a double seal helps keep it contained.
- Get Creative with Faces: No cookie cutter? No problem. Draw a simple doll on paper, cut it out, and use it as a stencil on the dough. Remember, the more jagged the eyes and mouth, the creepier!
- Vegan Version: To make this vegan, brush with plant milk (instead of egg wash) and use maple syrup or agave syrup (with red coloring) instead of honey for the blood. (Or skip the blood drizzle and use a thick vegan jam filling for color.)
- Nut Allergy Safe: All ingredients here are nut-free, but always double-check your pastry and any add-ins for hidden nuts or nut oils if cooking for someone with an allergy.
- Make Ahead: You can cut and assemble the dolls ahead of time, then freeze them on the baking sheet. When you’re ready, bake them from frozen (just add a couple extra minutes). The honey “blood” can be mixed in advance and refrigerated – just warm it slightly before drizzling so it flows.
- Reheating: Leftovers can lose crispness. Reheat baked dolls in a 350°F (180°C) oven for 3–5 minutes to crisp them up again before serving. The honey will soften a bit but be careful not to heat too long or the honey will melt off.
- Kid Helpers: These are fun for kids to help with (with supervision). Let them cut simple shapes or spoon on the jam. Just keep them away from the hot oven and handle the sharp knife yourself.
- Clean Edges: Wipe any pastry crumbs or spills on the tray before baking to prevent burning.
Frequently Asked Questions
Q1: Can I make these ahead of time?
A: Yes! You can assemble and cut out the voodoo dolls in advance. Freeze them on a tray right after shaping (before baking). When needed, bake them straight from frozen – just add a few extra minutes to the bake time. This way, you can prepare in advance and serve fresh for your party. You can also mix the honey blood a bit ahead; store it in the fridge and warm it slightly before drizzling.
Q2: Is this recipe vegan and vegetarian?
A: The dolls themselves are vegetarian (they contain no meat). They are naturally nut-free. However, they use honey and a dairy wash by default, so they are not strictly vegan. To make it vegan, use a plant-based milk or aquafaba (chickpea brine) for brushing instead of dairy, and substitute honey with maple syrup or agave. You can still add red food coloring to maple syrup to mimic the blood. (Or make the hidden filling with mashed red fruit instead.)
Q3: What if I don’t have red food coloring?
A: You can use natural alternatives to dye the honey red. A drop of beet juice or a pinch of beetroot powder will add a red hue (and it stays vegan). A little raspberry or pomegranate juice can work too, though the honey may loosen a bit – just heat and reduce it slightly to thicken again. Alternatively, skip the dye and let the golden honey contrast with a doll’s pale pastry for a different eerie look.
Q4: Can I use something other than honey for the fake blood?
A: Yes. The key is something sweet and sticky that can take on color. If you prefer not to use honey, you could heat a bit of light corn syrup (or golden syrup) with red coloring. Or mix pancake syrup with cocoa and red dye for a darker blood. Another fun option is strawberry or raspberry jam thinned with a little water – it’s red, sweet, and looks like bleeding guts (but it will be more jelly-like). Honey is nice because it’s very sticky and glossy, but feel free to experiment.
Q5: How do I keep the pastry crisp after baking?
A: Puff pastry is best eaten fresh out of the oven. If you must store any leftovers, keep them in an airtight container at room temperature for up to 1 day. To re-crisp them, pop the baked dolls into a warm oven (350°F/180°C) for 3–5 minutes. This revives the flaky texture. Don’t cover them while hot or they’ll steam and get soggy.
Q6: Is there an alternative to using a cookie cutter?
A: Absolutely. If you don’t have a doll-shaped cutter, improvise! Cut a simple gingerbread-person shape by hand, or any creepy shape (a ghost, cat, or even just a circle face). You can freehand the outline with a paring knife. The key is to have a shape with a flat surface and simple edges, so you can carve eyes and a mouth.
Q7: How should I store leftovers, and how long will they keep?
A: Store leftover voodoo dolls in an airtight container at room temperature for 1–2 days (they taste best on day 1). If you have colored syrup on them, they can get a bit sticky over time. You can also refrigerate them if you added perishable fillings, but that will make the pastry lose crispness. Whenever you store them, always reheat before serving to restore texture.
Q8: Are these safe for kids?
A: Yes, absolutely—these are meant to be fun for all ages! Just beware that honey can be hot right out of the bowl, so let them help with cautious tasks. And note, raw honey shouldn’t be fed to infants under 1 year old (though it’s cooked here). Other than that, kids will love getting involved: they can help cut out the dough, pinch the edges, or paint on the “blood.” It’s a great activity for a parent-child baking session.
Q9: Can I freeze the assembled or baked voodoo dolls?
A: You can freeze the unbaked assembled dolls as mentioned above. This is actually very convenient – just line them on a tray in the freezer for a couple of hours, then transfer to a freezer bag. They’ll keep frozen for a few weeks. Bake them from frozen when ready (again, add a few extra minutes). Once baked, I don’t recommend freezing them again as reheating works better for texture.
Q10: Is puff pastry the only dough I can use?
A: Puff pastry gives the crispiest, flakiest result and is very foolproof. However, if you’re in a pinch, you could try using crescent roll dough or even cut biscuit dough, but the texture will be different. Puff pastry puffs up and looks great for these dolls. If you use a different dough, you may need to adjust bake times and expect a more bread-like result.
Conclusion
We hope you enjoy making (and sharing!) these Easy Puff Pastry Voodoo Dolls with honey fake blood as much as we do. They’re a playful way to bring a little magic and mischief to your Halloween kitchen. Let us know how your voodoo dolls turned out – did you make them extra bloody? If you tried this recipe, please leave a rating and comment below. Your feedback helps us and fellow home chefs know what’s working. Have fun, and happy haunting in the kitchen!